Showing posts with label DIY. Show all posts

Sunday, 9 March 2014

Using cosplay for everyday outfits - FREE!

Hello everyone! 
Hope you're all doing well :)


Yesterday I was cleaning my room and it got me thinking that I incorporate alot of my cosplays into my everyday clothing. SO! that being said - thought I'd make some blog entries on using some cosplay pieces of clothing and transitioning it into your everyday outfits.

It's quite common amongst us cosplayers here in Australia (well Sydney) that we cosplayers wear some of our cosplay pieces in our everyday outfit, so hopefully this can inspire you somehow to do so too ^_^)/

Now I understand alot of people may think you're weird or give you strange looks because you stand out or whatever BUT! I personally love looking different but at the same time not overdoing it (sometimes ;D). If people recognise a certain piece such as SNK jacket or Iwatobi jacket - then just rock the outfit even more ^_^)/ 


So that being said I understand that many of the following outfit may not be according to your taste but this is just to inspire and give you ideas of how you can use your cosplay pieces into your outfits :D 

So lets get started with the FREE! outfits ^_^)/

Outfit #1:
- FREE! ED shirt
- Iwatobi Jacket

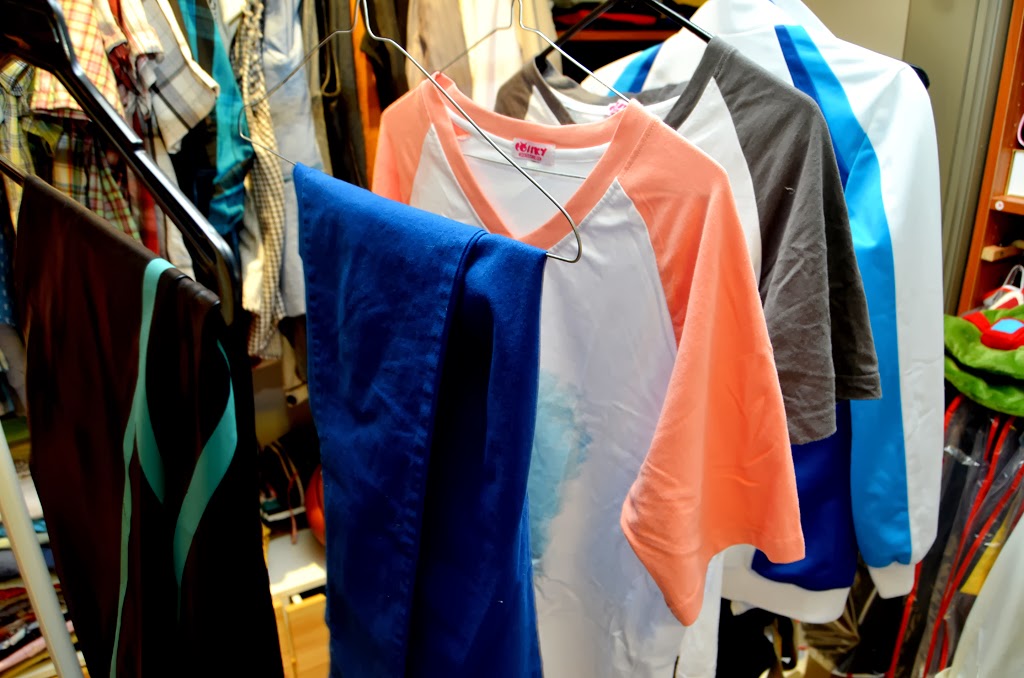
I actually ALWAYS wear the FREE! ending shirt because they're light, comfy and also have a raglan shirt style which is commonly seen worn on the shirt. Also they have a cute animal design - why not!? *^*)/

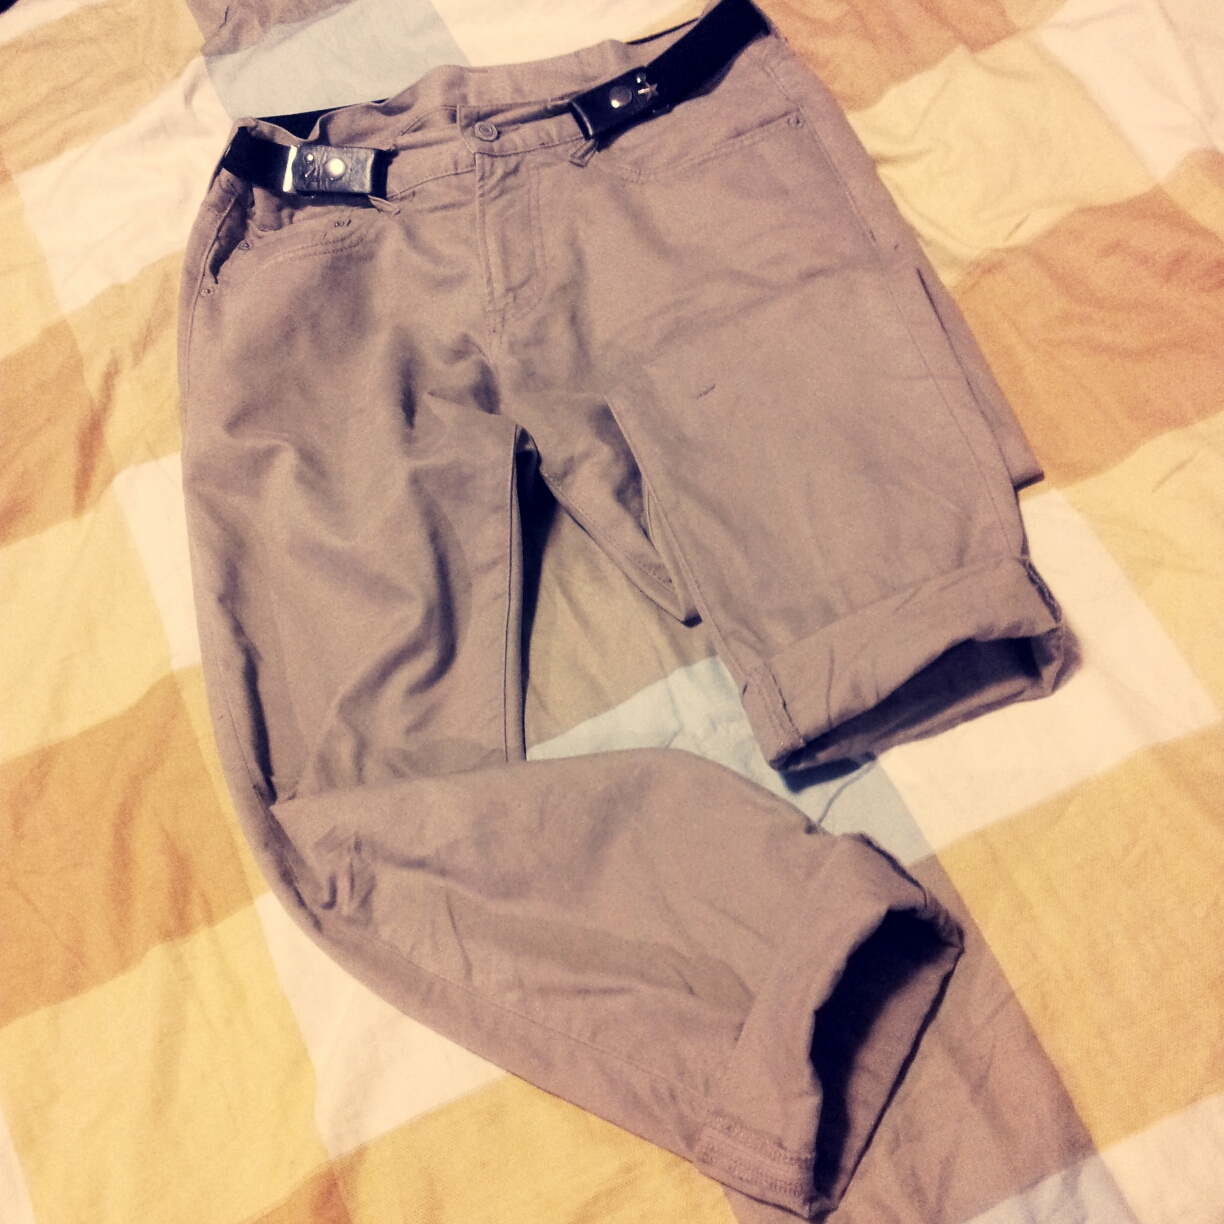
Here I wore my Nagisa shirt paired with matching pink glasses, handmade blue & red bracelet (gift from a friend in Vietnam) and royal blue skinny chinos with blue shoes. 
These pants really reminded me of the pants the characters wear when they wear their uniform with the yellow Iwatobi shirt. I rolled up the legs just abit to give it more of a fresh feel, similar to what Makoto wore. Super comfy everyday outfit perfect for going to school, college, or outtings. Can also be worn with other character shirts :)


Outfit #2 - Haru inspired
- FREE! ED shirt
- Iwatobi jacket

A Haru inspired style keeping the outfit blue keeping in mind to wear different shades of blue so you don't look washed out. I switched up my pants to these blue shorts to match the dolphin of the Haru shirt, paired with blue glasses and blue shoes. Changed up the bracelet to be an anklet so give that summer feel. Another refreshing outfit perfect for summer.


Outfit #3 - Nagisa inspired
- FREE! ED shirt
- Iwatobi jacket

A Nagisa inspired style where it reflects on Nagisa's fun and bubbly nature with bright colors and keeping the red/pink shades to match. Paired the top with pink shorts, red boots, pink glasses, a fun glasses necklace and the red&blue bracelet as earlier. Perfect fun outfit to wear in summer,  may stand out abit but if its too much - layer the jacket and all is well. The jacket compliments well since the shirt has blue on it. 


Outfit #4
-Free ED shirt
-Long swimmer trunks (MAKOTO)

Now this outfit is for those who are abit more on the extreme side. I LOVE my meggings/leggings paired with shorts and if you have the proper swimmer leggings made of spandex or fabric - then this is perfect. If you have the shiny pvc one like I do - it may stand out quite abit and also feel abit uncomfortable (because you sweat LOL). The swimmer trunks make great pairs of leggings with a very subtle pattern without making it look like sport compressors.

I paired my Makoto's green swimmer leggings with my beige shorts, Haru shirt, black boots, neutral earth-tone arm candy, yellow glasses and brass chain necklace. Unfortunately my Makoto trunks was the shiny pleather one so it didn't hug my skin nicely and was super shiny an what was funny that everytime I walk or move - it hear the sound like plastic bags rustling haha! As mentioned earlier- this would be perfect if you have the fabric type like spandex or lycra etc.
But overall I really do enjoy this outfit, Super comfortable and can be worn easily for cooler season like autumn, winter and spring.


 Anyway that is all I currently have for the FREE! inspired outfits utilising the cosplay pieces. The combination and ideas are endless so hope this inspires you to use your cosplays :)

Stay updated for the next blogpost *^*)/
Until then stay well & take care!

Thursday, 11 April 2013

Making of Tiger print hooded vest

Hey guys, how's it going?

So recently I've been working on this little DIY project ever since I randomly came across this tiger printed fabric. I've always wanted to own something that was animal printed so I thought I'd make something that's versatile and able to wear in almost all weathers and almost with any outfit~ a hooded long vest.

Why a hooded long vest? Why not just a normal vest or a long vest or a normal hooded vest? Well the reason is that I've always been succumbed around long top garments such as long sweaters, long sweaters, long coats etc especially through Japanese and Korean fashion seen online, in movies, dramas etc. 

When I mean long garments, I don't mean oversized- it fits nicely around the body but just longer in length to cover over or half way of the bottom/bum. 

So being inspired by Japanese and Korean fashion, I decided to make a long garment and especially with the animal print since it is quite commonly incorporated into their fashion.

Why a vest? A vest is very versatile and can be incorporated so easily into your style from wearing the piece alone or layering over other pieces. Especially with a busy pattern like animal print, it adds a strong bold character to such versatile piece.

Why a hoodie? A long vest would look very classy, in order to make it look more casual and edgy- it would look better as a normal sized vest. Therefore I added a hoodie to give it that casual edgy feel and toning down the classiness. 

Hopefully that explains why I chose to make a long hooded vest out of the tiger print fabric. The fabric I bought costed $7.00AUS per metre with a width of 2.1metre. It has a feel similar to a blanket, so its nice and fluffy and somewhat furry but not overly furry. It has a stretch, very lightweight, loose and also printed double sided.

Got home with the fabric and started researching on making a hoodies since I've never made a hoodie before, got an idea and then started cutting out my patterns and fabric.

Here is a video of me just cutting out and sewing the fabric. You really can't see much but yeah.


After sewing the base, I thought the hoodie was missing something, especially when I wasn't planning to have a lining. So decided to bring out the black vinyl or pleather that my mom bought me from vietnam and utilise it as a hoodie lining.

After that day of sewing, I ended up with:


FINALLY A PICTURE INSTEAD OF BORING WRITING
OH! HAVE TO TELL YOU MY UPSETTING STORY. For the hoodie, I originally wanted to make a furry trimmed hoodie so decided to go find some fur trims. NONE of which I liked OR afford even.
I first went to Spotlight which had some fur trims but IT WAS $15AUS A METRE which I needed 70cm so therefore it was a no, plus it was in a light beige meerkat-like color which wouldn't match my fabric. 
Drove to Lincraft which literally had no fur trims, but had feather trims which was a no for me. BUT they had a super nice faux fur fabric which was super nice, thick and perfect brown color; however it was a roll of fabric which costed $37AUS per metre in which I'd probably would only need 20cm of that roll which they don't sell -_-;
Running out of hope, I decide to drive to Cabramatta which is local to me and sells cheap fabric. No luck, they guy didn't have any thick puffy faux furr.
At this point I was already really upset and started actually yelling in my car with all my windows up LOLOL! But yeah, end of my depressing story. :D

Anyway I left the project on hold abit just to gather some ideas on how I could improve on it. Didnt' work on and finish it until the day before the photoshoot since I decided to have another casual photoshoot to show off my new creation but yeah eventually got it done :)


Added some black vinyl as an inner placket to hem the raw edges of the front placket which creates a slight collar on the vest. Also added a flap pocket which TOOK FOREVER to work on because I was struggling on how to make the flap pocket with the pocket. Eventually I got it done with great help to my dad who is a tailor which he did a great job and taught me alot.
The black vinyl definitely adds class and edginess to the outfit which is great :D

Did some test styling to prepare for the photoshoot the next day.


Oh right forgot to mention about what I end up doing with the trims of the hoodie. I ended up using the left over fabric that I used for the vest and rolled it up to make it slightly puffy and sew it in. In the end, I thought it really went well and even better than the fur trims I originally had in mind. :D


Also experimented and made this arm piece thing that looks like some bondage thing but yeah, was inspired after seeing something similar on television about a fashion show and they were wrapping the model's legs with this but in gold if I remember correctly. It was super easy to make as it just uses eyelets, cords and strings. What I used here is a string that contains eyelets already so I just threaded elastic cords around my arm through the eyelets. I thought It looked really cool and adds a little something to the whole outfit.


Last style testing and pretty much decided for the photoshoot. :D

I will make another post on the photoshoot since this entry is just getting too long.
Until then, stay well & take care!

Wednesday, 20 March 2013

DIY : Slouch beanie with old clothes

How's it going everyone, hope you're all doing well!

Here is another DIY making a slouch beanie using old unwanted clothes. 


Slouch beanies have been really popular for a while now since it is such a simple versatile piece that can be worn in almost all weathers whilst adding a nice touch of style for your head. They're like your average beanies however is more elongated and hangs or bags towards the back hence the "slouch". The slouch beanie is definitely popular amongst korean fashion and along skater/punk fashion.


Now I know there are ALOT of tutorials for this DIY but I just thought I'd make one for my blog. And also simply because whilst I make some for myself, might as well share on how to make these slouch beanies.

So lets get started! Here are some things you'll need:
→ Unwanted clothes or any kind of stretchy fabric. NOTE : the fabric should somewhat be stretchy so it can fit and wrap around your head
→ A beanie for template (optional)
→ Scissors
→ Sewing machine OR Thread and Needle


1. Lay your fabric or unwanted clothes down onto a flat surface and smooth out and bumps/creases.
Here I'm using an old singlet that has been quite worned out and stretched.


2. If you have a beanie, place it down in the bottom centre of the fabric where there the edges are hemmed/overlocked. Use this as a template and mark out how big and long you want your slouch beanie to be. The longer the beanie, the longer the slouch. If the slouch is too long, it'll look like an elf hat.

If you don't have a beanie, just mark out how big and long you want your slouch beanie to be along the bottom centre of the fabric where the edges are hemmed/overlocked.

The reason why you want to ues the bottom hemmed/overlocked edges is because it just saves you time to hem the ends, especially when their type of hemming allows the fabric to stretch without loosening up the thread.


 To make the cutting process more easier, you can fold the fabric in half lengthwise.


3. Cut our your marked fabric and you should end up with a beanie pattern that is slightly longer than a usual beanie.


4. Place your fabric inside out so the correct sides face each other and start hemming around the endes of the beanie (red ziggzagg in the picture below), REMEMBER NOT TO SEW UP THE ALREADY HEMMED EDGES/OPENING OF THE HAT.


5. Turn your hat inside out and you should end up with a slouch beanie. Try on the beanie and style accordingly. Adjust by cutting and sewing if necessary.


And there you go, you're own slouch beanie :D


Sorry for the low quality pictures. Hope you enjoy this tutorial!
Until then, stay well & take care!

Wednesday, 13 March 2013

DIY bracelets with jewellery cords & hexnuts

How's it going everyone, hope you're all doing well.

I've been really in the mood for DIY and make some new bracelets or arm candy since I always love to wear something on my wrist with my outfits as I feel it ties the outfit together and also adds character and definition to who you are and your outfit.

Here are a few bracelets I made using jewellery cords and hexnuts, inspired by 'Anneorshine' on Youtube.


I really think these bracelets look really cool, edgy yet subtle enough for a classy look. Both bracelets are fitted nicely around my wrist without sliding around since I thought they looked better when they're fitted on the wrist.

To make these bracelets, all you'll need is:
→ Hex-nuts (I use 4mm hexnuts found at hardware stores)
→ Waxed Jewellery cords (I use black 1mm waxed jewellery cord)

For easier references to make the top bracelet which has a zipper effect, please watch the following video by Anneorshine:


The technique involves a basic 3-part braid, slotting in hexnuts on each side and braiding through.
You should end up something like or simile to this:


The bottom bracelet is more complex and requires a more complicated technique called square knotting.
Here is a great video by Secretlifeofabionerd on how to square knot:


While square knotting, you add a hex-nut in the centre rope and do the square knot and then insert another hex-nut in the centre rope and do another square knot and repeat the steps to the desired length. You should be able to achieve something like this:


It's preferred that you get the hang of the square knotting technique because then adding the hex-nut and square knotting will be extremely easy. I also made the bracelet adjustable with dangling hex-nuts.

To make the adjustable part, I also used the square knotting technique. Please watch the following video to learn how to do an adjustable square knot closure (the voiceover is quite bad imo) :


And you should be able to learn how to make an adjustable square knot closure :)
Once you learn the many techniques such as basic braids and square knotting, you're free to be creative and make many bracelets like the one I made here using different type of jewellery cords:


That's it for the post. Sorry that it's not much of a DIY, really just wanted to share my experiences and my creativity and where I learn and get it from.

Until then, stay well, take care and goodluck!

Sunday, 3 February 2013

First OOTD (Outfit of the day) Post

Yo! Hope you're all doing well!

A couple of friends of mine were saying how I should do posts (both videos and blog entries) on my outfit of the day, so I thought I'd make a blog post on it :D

Now I wouldn't call myself stylish as people say, I'm just someone who likes to dress it up wherever I go. Of course not all the time, usually when I go out or hang out with people then I dress it up but if it's something fast and simple (like going grocery store quickly to buy bread or something) then I just put on the closest clothes around even if they don't go well together.

Even though I like to dress it up, I don't really buy new clothes (mainly due to the fact I'm unemployed and have no form of income or financial support) so I often just wear old clothes in a way it doesn't look like I wear it so much. But of course some styles and combinatiosn are repetitive but yeah! :D

So today (Saturday 2nd February 2013) wasn't anything special, I was just in the mood to dress it up to go out for abit and also tend to dress it up on cooler weathers like today. Mom asked me to go accompany her to go grocery shopping in our local town, so this is what I wore in the daytime :


Warm and comfortable and (hopefully) not overdressed for just grocery shopping with mom at our local asian town.

Lets start from head to toe:
→ Small soft black fedora hat to cover my bed hair. Actually had this hat for approximately 6+years :D I didn't wear this hat until year 2011-2013 because I just couldn't incorporate it into my clothing style but yeah, now I love it XD


→ Somewhat medium-thick large frame black glasses which are prescribed because I'm short sighted .___.;


→ DIY necklace/chain which I wear almost ALL the time with all my outfit because it compliments outfits so well in my opinion as the chain can be adjusted. Made from a drawstring fastener and copper brassy chain bought from craft stores. 


→ Oversized drop-shoulder dark blue shirt from ASOS.com or what I call it the boomer (from Left for Dead game) shirt. Great light and flowy shirt, and the style is just so unique because of the intended oversizeness. Also have this shirt in a camel color.


→ Oversized knit horizontal striped black and navy-grey cardigan. Bought this cardigan on sale (well kinda clearance) because it had a slight hole on the shoulder which didn't bother me and the size was XL and yeah. Only recently took it out :D Since the cardigan was too big on me, decided to under roll-up the sleeves to loosen up the baggy look. Also allows me to wear some arm accessories haha!


→ Arm accessories or arm candies worn for this outfit was just bracelets I made. Stacked three bracelets different in color and texture which complimented the color of the clothes I wore. And the chain on the right in the picture below is just my neckchain I wore with the outfit.


→ For the bottoms, I wore my beige/camel slim fitted cargo pants that I bought in Japan at G.U store and rolled up the bottoms just above my boots to make it more casual and show off my boots. Also wore a waist fastener that I also bought from Japan at Harajuku. I like these heaps better than belts because belts just look super chunky in the middle and awkward too when showing through your top.


→ For the shoes, my all time favorite overworn black suede booties I bought from Ebay. I wear these boots everywhere  because they're super comfy, has quite a heel to it, and just looks great. But they really are super comfy- I brought these along when I was travelling to Vietnam & Japan, I wear these when I'm doing dance covers, etc. 


For the night, I kept the bottom half the same but just rolled the pants down so it covered half the boots so you know they're booties. Changed up my outfit and styling to head out to dinner at our local RSL club buffet with my mom.


→ Crimped my hair for some texture and also styled it accordingly and setted it with hairspray. Also my eyebrows were filled in so I actually have eyebrows LOL! Glasses are the same as I am blind and it complimented the outfit and gave the face a little something.


→ Kept the oversized shirt as a base as it was pretty cold outside but layered it with a large suede dress shirt that I self blinged up with gold studs. It was the first shirt that I ever blinged up and  it has got to be one of my favorite shirt to wear. Its super warm, comfy and the bling just looks so classy yet badass. I rolled up the sleeves so the look is more casual and more fitted. 
Funny thing whilst at the clulb was that when I was swiping my membership card, one of the worker (quite an old bloke) told me that technically that studs aren't allowed in the RSL Club but he let me off since no one noticed it. I was surprised by that rule and never actually saw that in the dress code warnings but yeah. hahaha

Here's the front of the shirt.


Closer view on the blinging details I did. Studed the corner of the collars, abit on the top of the pocket and the corner of the shoulder panels.

Back view of the shirt


Closer detail on the shirt. Outlined back panel and studed abit on the back of the collar.


→ For the accessories, I kept it simple with a detailed gear gold watch (that doesn't work no more) with black leather straps; and chains. The watch gave it a bold, classy, and sophisticated look, yet the gear detail gave it a more casual and edgy look especially when the chain bracelet was added.


So yeah that's my outfit for the day. 
Hope you enjoy these type of posts- will try my best to make posts more like this.
Until then, stay well, take care & goodnight! 

Saturday, 2 February 2013

Revamping old clothes

Whatsup everyone, hope you're all doing well!

Wasn't feeling so great today since I woke up and instantly saw an email from a job place I applied stating that I didn't get the position due to the fact I lack in the requirements. And the requirements that I thought I lacked in was customer service and communication, and natural ingredient & cosmetic knowledge. This was the second time I got rejected quite instantly after sending in my CV but yeah, wasn't until my friend tweeted:

"You're getting rejected because the perfect job is waiting for you to take ~ Ganbatte!"

Which made really cheered me up and made me get my confidence back on because I truly think and hoping that it's true and the perfect job is just somewhere out there waiting for me. So I will always try my best and survive through :)

Anyway- suddenly felt productive and creative so decided to work on the old clothes I kept aside to revamp so I can wear it out.

Decided to work on this oversized plaided dress shirt which I don't wear anymore because it is just too big and was quite difficult for me to layer over as it is short sleeve. Also I wore this way too many times to Uni.  (Sorry for the bad photo)


I really liked the pattern so really wanted to keep it and just change the style up. So I decided to cut the sleeves off and make it into a sleeveless top/vest which was similar style to one of my vest jacket which was also plaided.

Took out my mini sewing machine since my parents were working in the sewing room and literally my room looked like those designers work area where fabric and clothes was scattered along with some accessories and blings.

Chopped off the sleeves and wanted some fray to it, tried it on and it still looked very boring. Decided to do a front-shoulder pad thing using spare black fabric I had. Sewed the pad on and it looked quite good in my opinion but it just didn't stand out and looked quite strange the fact it was separated with the back piece. Took out the small dark metallic studs and studded the separation line and BAM, more attention. 


Only did one side at first and wasn't sure if I wanted to do it on both side BUT I eventually did. Added some studs on the corners of the collar for some bling to match the sides and yeah.


Full frontal view of the new revamped shirt. It kinda looks like a dress from this view but it's just quite long because it was oversized.


Now the back was lacking details which bothered me, so decided to also work on the back and cover the mid section of the mid-lower back and ended with a slight V-shape and also added some big and small studs. Wasn't sure if I wanted to sew the bottom or the V-shape area, but in the end decided to let it loose and just have the studs hold down the V-point so the fabric can fray abit over time. Also added some studs on the back of the collar.


And yeah, that's just me revamping one of my old clothes. Hope to do more and hope to be able to take pictures while wearing this soon :D

Until then, stay well & take care!

Thursday, 17 January 2013

DIY: Deep cleaning Makeup Brushes

Hope you're all doing well!

*UPDATE: Here's my YouTube tutorial video on how I deep-clean my brushes :)


My makeup brushes are pretty much constantly dirty everytime I do a cosplay makeup test (costest) where I use almost all my brushes with different type products from liquid to powder. Here I will show you my method on how I deep-cleanse my makeup brushes so they are super clean and soft as if they're new; and also conditioned so the brushes last longer.


In some cases, I spot-clean my brushes where I used powdered products like eyeshadow, so I just use makeup remover wipes and just wipe my brushes clean so that no more residue is left behind. HOWEVER for brushes where I used liquid products such as liquid foundation or cream concealer- I always give the brush a deep-cleanse as liquid or moist products tends to attract bacteria and dirt; as spot cleaning does not remove all the products- which can actually harm your skin.


So here are some dirty brushes I used for the "Litchi Hikari Club" makeup inspired look, and they have not been spot-cleaned (don't worry, I haven't touched these brushes again as I wanted to make a post about deep cleaning my brush) :D 


Oh, just a side note- my makeup brushes I use are just cheap brushes in which they are somewhat great quality as the bristles and hairs do not fall out, and my skin doesn't seem to have any allergic reaction to them ;)

Here are the products I used to mix together to make the cleaning agent owo)/
I actually learnt this method from MichellePhan but just tweaked it a little.


Here's a little information on what the products do: 
Hair conditioner : this will condition the hair/bristles of your brushes since the dishwashing liquid is quite harsh (even if it says gentle). And makes your brushes feel super soft as well ;D
Antibacterial Hand wash : kills the germs and bacteria present on the brushes
Dishwashing liquid : Removes the products and cleans the brushes. Try to find a dishwashing liquid that states that it's gentle and/or anti-bacterial. The reason why dishwashing liquid rather than just soap is that it has more cleaning properties that enables it to remove more product that just regular soap such as oils and grease (from foundation/concealers/skin)
Extra Virgin Olive Oil : Removes products (especially wax based) on the brushes where oil-based cleansers must be used to remove them. Also aids in conditioning the brushes :)

So there you have it- now the ratio may differ depending on what you like and prefer.

For me- I usually go with :
→ 1 TEAspoon of Conditioner
→ 1 TEAspoon of Antibacterial Soap
→ 1 TABLEspoon of Dishwashing detergent
→ 1 TABLEspoon of Extra Virgin Olive Oil

Following that, this is what I got! ^_^ which kinda looks like egg mixture for egg wash or scrambled eggs .___.;


After you mixed your cleaning agent, it's time to clean the brushes.

What I usually do is either dip the brush in the cleaning agent or scoop the cleaning agent with the teaspoon and pour it onto my palm and just swirl the brush back and forth so that the brush is clean and the left-over makeup product is removed, and just set it aside. 
To check if there is any left-over makeup residue on the brush, squeeze the bristles out with the cleaning agent and see if there are any residues left. If not, it's good to move on.
Repeat this step for each brush, preferably from smallest to largest.


Rinse each brush under semi-warm running water until there is no soapiness when squeezing the bristles.

Thoroughly wipe the brushes with paper towel and then place it vertically so that the water can drop down out of the bristles due to gravity without enabling the water to travel up the handle to loosen the glue. Like so :D


Allow the brushes to dry vertically in open air. Be sure NOT to dry them in DIRECT SUNLIGHT as this damages your brushes and leaves your brushes damn in the centre.

Depending on the weather and temperature and the brush size, the drying vary. I think about 1.5 hours on average for my brushes but sometimes longer for bigger brushes. I also used the leftover cleaning agent to clean the brush guard for my foundation powder brush :)

Once it's dried, your brushes should feel really nice and soft and also somewhat smelling nicer than it did hahaha!


Store them like you usually do, and your brushes are ready to use.

But yeah, this is just how I clean my brushes which is technically the same method as MichellePhan as shown in her video :


Anyway that's it for this post. Hopefully it is somewhat helpful.

Until then, stay well & take care